Southern-Style Buttermilk Fried Chicken (Inspired by Popeye’s)
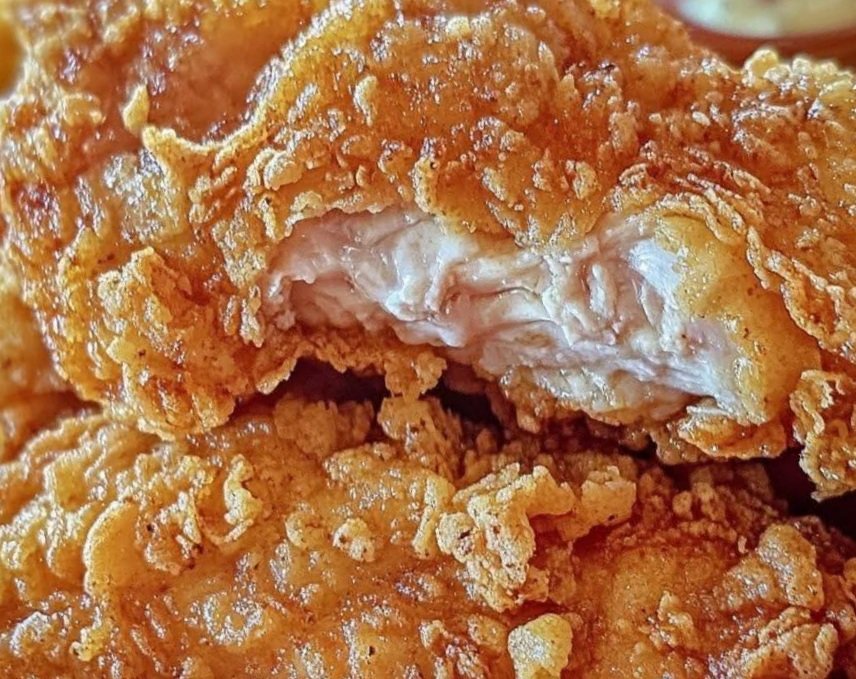
Craving that iconic crispy, golden fried chicken with a spicy kick that rivals your favorite fast-food joint? This Southern-Style Buttermilk Fried Chicken recipe captures the soul of crunchy, flavorful fried chicken with a nod to the beloved flavors of Popeye’s. With a tangy buttermilk marinade and a perfectly seasoned, crispy coating, this homemade version brings restaurant-quality comfort food to your kitchen. Whether you’re hosting a family gathering, a game-day feast, or just treating yourself, this recipe delivers juicy, tender chicken with a satisfying crunch in every bite. Let’s dive into how to make this irresistible dish!
Why You’ll Love This Fried Chicken Recipe
- Crispy Perfection: A blend of flour and cornstarch creates an ultra-crisp coating that stays crunchy even after cooling.
- Bold Southern Flavors: A spice mix with paprika, cayenne, and garlic brings that signature zesty, mildly spicy kick.
- Juicy and Tender: The buttermilk marinade tenderizes the chicken, ensuring every bite is succulent and flavorful.
- Customizable Heat: Adjust the cayenne pepper to suit your spice tolerance—mild or fiery, it’s up to you!
- Perfect for Any Occasion: From casual weeknight dinners to festive gatherings, this chicken is a crowd-pleaser.
Ingredients
For the Chicken and Marinade:
- 4–5 lbs bone-in chicken pieces (drumsticks, thighs, wings, or a mix)
- 2½ cups buttermilk (full-fat for best results)
- 1 tbsp hot sauce (optional, for extra tang and subtle heat)
For the Seasoned Coating:
- 2½ cups all-purpose flour
- ¾ cup cornstarch (for extra crispiness)
- 1½ tbsp smoked paprika (adds a smoky depth)
- 2 tsp garlic powder
- 2 tsp onion powder
- 1½ tsp cayenne pepper (adjust to taste for heat level)
- 1 tsp smoked chili powder (optional, for a unique twist)
- 1½ tsp kosher salt
- 1 tsp freshly ground black pepper
- ½ tsp dried thyme (for a subtle herbaceous note)
For Frying:
- Vegetable oil, peanut oil, or canola oil (enough for deep frying, about 2–3 quarts depending on your fryer or pot)
Equipment Needed
- Large mixing bowls (for marinating and coating)
- Whisk or fork (for mixing the coating)
- Deep skillet, Dutch oven, or deep fryer
- Cooking thermometer (to monitor oil temperature)
- Tongs or a slotted spoon (for handling hot chicken)
- Wire rack or paper towel-lined tray (for draining)
Instructions
Step 1: Marinate the Chicken
The secret to tender, flavorful fried chicken lies in the buttermilk marinade. In a large mixing bowl, place your bone-in chicken pieces—drumsticks, thighs, and wings work wonderfully for that classic fried chicken experience. Pour the buttermilk over the chicken, ensuring every piece is fully submerged. For an extra layer of flavor, add a tablespoon of hot sauce to the buttermilk for a subtle zing. Stir gently to coat, then cover the bowl with plastic wrap or a lid and refrigerate. Let the chicken marinate for at least 2 hours, but for the best results, allow it to soak overnight (8–12 hours). This extended marinating time tenderizes the meat and infuses it with rich, tangy flavor.
Pro Tip: If you’re short on time, a minimum of 2 hours will still work, but the longer soak yields juicier, more flavorful chicken.
Step 2: Prepare the Seasoned Coating
While the chicken marinates, prepare the crunchy coating that gives this fried chicken its irresistible texture and bold taste. In a large, shallow bowl or baking dish, combine the all-purpose flour, cornstarch, smoked paprika, garlic powder, onion powder, cayenne pepper, smoked chili powder (if using), kosher salt, black pepper, and dried thyme. Whisk the dry ingredients together until evenly blended, ensuring the spices are well-distributed for consistent flavor in every bite.
The cornstarch is a game-changer here—it lightens the coating and enhances crispiness, mimicking the texture of restaurant-style fried chicken. If you prefer a spicier kick, feel free to increase the cayenne pepper by ½ teaspoon or add a pinch of red pepper flakes. For milder palates, reduce the cayenne to ½ teaspoon.
Pro Tip: Set aside a small portion of the seasoning mix (without flour) to sprinkle over the fried chicken for an extra flavor boost after cooking.
Step 3: Coat the Chicken
Once the chicken has marinated, remove it from the refrigerator and let it sit at room temperature for about 15–20 minutes. This helps the chicken cook more evenly and prevents the oil temperature from dropping too drastically during frying. Working one piece at a time, lift a piece of chicken from the buttermilk, allowing the excess to drip off. Place the chicken in the seasoned flour mixture, pressing down firmly and turning to coat every surface thoroughly. For an extra-crispy crust, dip the coated chicken back into the buttermilk briefly, then dredge it in the flour mixture again. This double-dredging technique creates a thicker, crunchier coating.
Place the coated chicken pieces on a wire rack or plate and let them rest for 5–10 minutes. This resting period helps the coating adhere better, reducing the chance of it flaking off during frying.
Step 4: Heat the Oil
In a deep skillet, Dutch oven, or deep fryer, pour enough oil to submerge the chicken pieces (about 2–3 inches deep, depending on your cookware). Heat the oil over medium-high heat until it reaches 350°F (175°C). Use a cooking thermometer to monitor the temperature, as maintaining consistent heat is crucial for crispy, evenly cooked chicken. If the oil is too cool, the chicken will absorb excess oil and become greasy; if it’s too hot, the coating will burn before the chicken cooks through.
Safety Tip: Never leave hot oil unattended, and keep a lid or fire extinguisher nearby in case of emergencies.
Step 5: Fry the Chicken
Carefully lower the coated chicken pieces into the hot oil using tongs, working in batches to avoid overcrowding the pan. Overcrowding lowers the oil temperature and results in soggy chicken. Fry the chicken for 12–15 minutes per side, turning occasionally with tongs to ensure even browning. The chicken is done when the exterior is deep golden brown, and the internal temperature reaches 165°F (74°C) for white meat and 175°F (79°C) for dark meat.
Frying Tip: Dark meat (thighs and drumsticks) may take slightly longer to cook than wings. If frying mixed pieces, group similar pieces together in batches for consistent cooking times.
Step 6: Drain and Serve
Once cooked, use tongs or a slotted spoon to remove the chicken from the oil, letting excess oil drip off. Place the fried chicken on a wire rack set over a baking sheet or a plate lined with paper towels to drain. A wire rack is ideal as it allows air to circulate, keeping the coating crisp. If desired, sprinkle a pinch of the reserved seasoning mix over the hot chicken for an extra flavor pop.
Serve the fried chicken hot, paired with your favorite sides like mashed potatoes, coleslaw, biscuits, or mac and cheese for a true Southern feast. For a Popeye’s-inspired experience, drizzle with hot sauce or serve with a side of honey for dipping.
Prep and Cooking Times
- Prep Time: 20 minutes (plus 2–12 hours for marinating)
- Cook Time: 30–40 minutes (depending on batch size)
- Total Time: 2 hours 50 minutes (with minimum marinating time)
- Servings: 6–8 servings
- Calories: Approximately 420 kcal per serving (varies based on piece size and oil absorption)
Tips for Success
- Choose the Right Oil: Peanut oil is traditional for its high smoke point and neutral flavor, but vegetable or canola oil works well too. Avoid olive oil, as it burns at lower temperatures.
- Double-Dredge for Extra Crunch: The optional second dip in buttermilk and flour creates a thicker, craggier crust that mimics fast-food fried chicken.
- Monitor Oil Temperature: Invest in a reliable thermometer to keep the oil at 350°F. Adjust the heat as needed to maintain consistency.
- Rest the Coated Chicken: Letting the coated chicken sit before frying helps the breading stick, ensuring a uniform crust.
- Make It Your Own: Experiment with additional spices like cumin, oregano, or white pepper to personalize the flavor profile.
Serving Suggestions
This Southern-style fried chicken shines as the star of any meal. Here are some ideas to complete your spread:
- Classic Sides: Pair with creamy mashed potatoes, tangy coleslaw, or buttery cornbread.
- Sauces: Offer hot sauce, ranch, or a homemade honey-mustard dip for variety.
- Pickles: Add crunchy dill pickle slices on the side or as a topping for a fast-food-inspired touch.
- Beverages: Wash it down with sweet tea, lemonade, or a cold beer for the ultimate Southern vibe.
Storage and Reheating
- Refrigerating: Store leftover fried chicken in an airtight container in the refrigerator for up to 3 days.
- Freezing: Freeze cooked chicken in a freezer-safe bag for up to 2 months. Thaw in the refrigerator before reheating.
- Reheating: To restore crispiness, reheat in a 350°F (175°C) oven for 10–15 minutes or in an air fryer at 375°F (190°C) for 5–7 minutes. Avoid microwaving, as it softens the crust.
Why Make This at Home?
While fast-food fried chicken is convenient, nothing beats the satisfaction of homemade. This recipe lets you control the quality of ingredients, adjust the spice level, and enjoy the process of creating a dish that’s as delicious as it is rewarding. Plus, the aroma of frying chicken will fill your home with warmth and anticipation, making every bite even more special.
Final Thoughts
This Southern-Style Buttermilk Fried Chicken is more than just a recipe—it’s a celebration of bold flavors, crispy textures, and the joy of homemade comfort food. Whether you’re a seasoned home cook or a beginner looking to impress, this dish is approachable yet delivers restaurant-worthy results. So, roll up your sleeves, gather your ingredients, and get ready to fry up a batch of chicken that’ll have everyone coming back for seconds!