Decadent Butterfinger Caramel Cheesecake Bars: A Sweet Symphony of Crunch and Cream
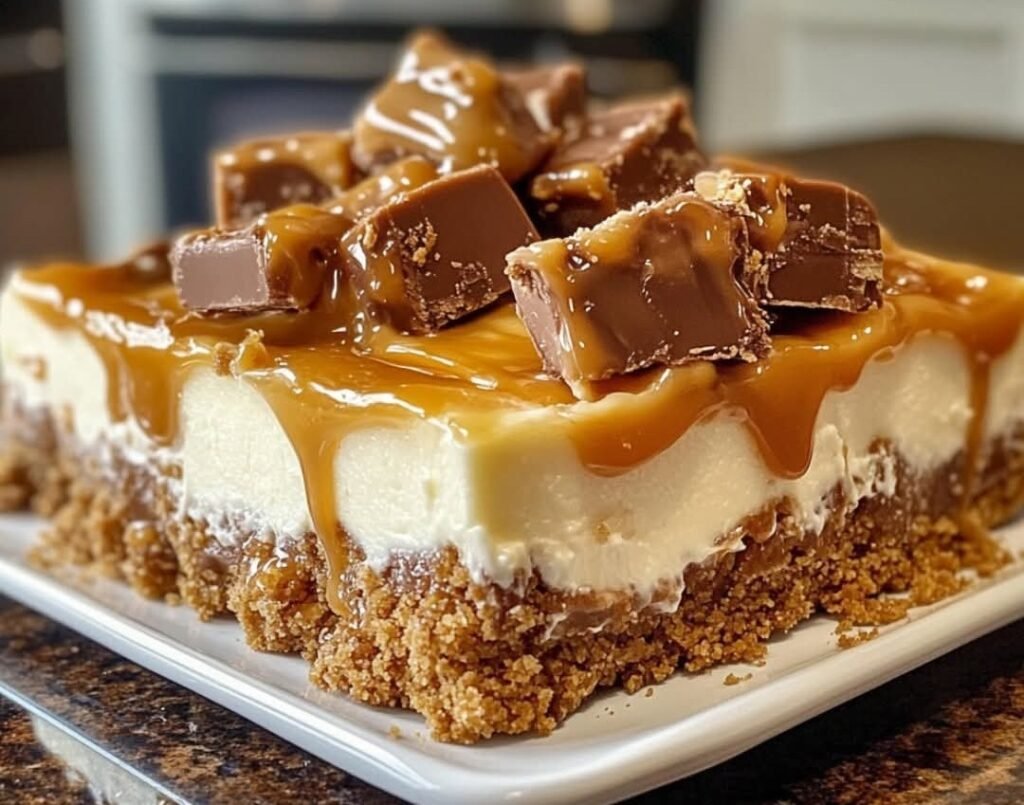
If you’re craving a dessert that’s equal parts indulgent, creamy, and delightfully crunchy, these Butterfinger Caramel Cheesecake Bars are about to become your new obsession. Combining the velvety richness of cheesecake with the gooey sweetness of caramel and the irresistible peanut buttery crunch of Butterfinger candy bars, this treat is perfect for parties, potlucks, or simply satisfying your sweet tooth. Whether you’re a seasoned baker or a kitchen newbie, this recipe is approachable yet impressive, delivering a dessert that looks as good as it tastes.
These bars start with a buttery graham cracker crust, followed by a luscious cream cheese filling, layered with swirls of caramel and chunks of Butterfinger candy bars. After baking to golden perfection, they’re topped with more caramel and candy for an extra dose of decadence. The result? A dessert that’s rich, balanced, and guaranteed to earn you rave reviews. Let’s dive into how to create this masterpiece in your own kitchen!
Ingredients for Butterfinger Caramel Cheesecake Bars
For the Graham Cracker Crust:
- 1 ½ cups graham cracker crumbs (about 10–12 full graham cracker sheets, finely crushed)
- ¼ cup granulated sugar (for a touch of sweetness to balance the buttery crust)
- ½ cup unsalted butter, melted (use high-quality butter for the best flavor)
For the Creamy Cheesecake Filling:
- 2 (8-ounce) packages cream cheese, softened (full-fat works best for richness; bring to room temperature for smooth blending)
- ¾ cup granulated sugar (for a perfectly sweetened filling)
- 1 teaspoon pure vanilla extract (for a warm, aromatic depth)
- 2 large eggs (room temperature ensures a smooth, lump-free batter)
For the Caramel and Butterfinger Layers:
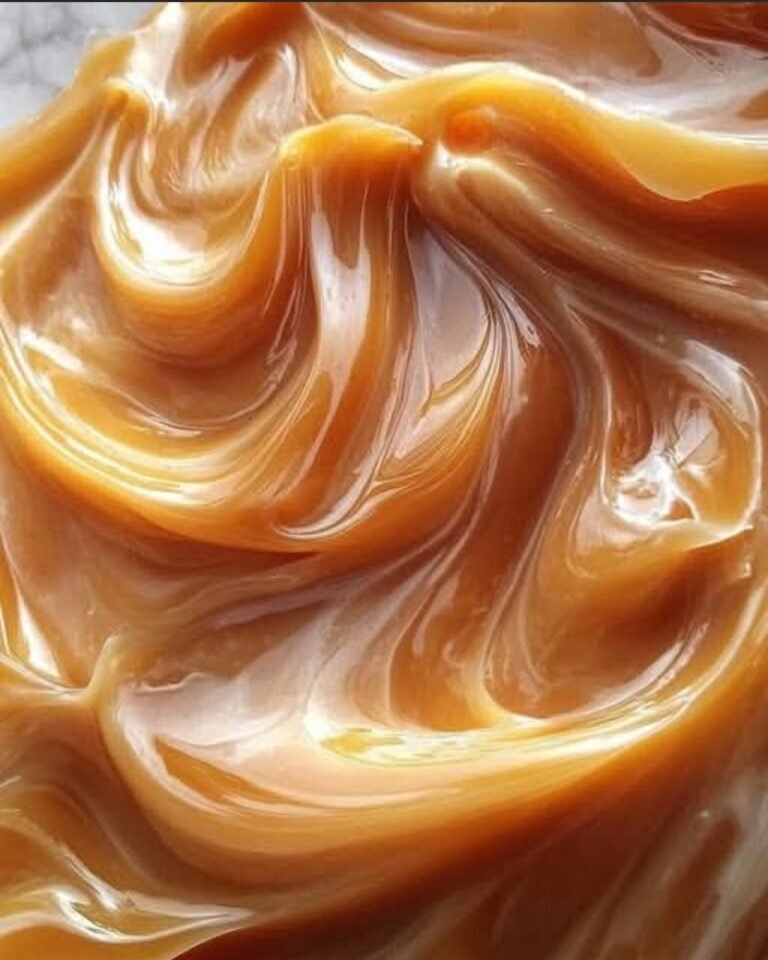
- 1 cup caramel sauce, divided (use store-bought for convenience or make your own for a homemade touch; ensure it’s thick but pourable)
- 5 fun-size Butterfinger candy bars, roughly chopped (about 1 cup chopped; feel free to add more for extra crunch)
Equipment You’ll Need
Before we get started, gather these kitchen tools to make the process seamless:
- 9×13-inch baking pan
- Parchment paper
- Mixing bowls (medium and large)
- Electric hand mixer or stand mixer
- Measuring cups and spoons
- Spatula
- Wire cooling rack
- Sharp knife for cutting bars
Step-by-Step Instructions for Butterfinger Caramel Cheesecake Bars
Step 1: Preheat and Prep Your Pan
Begin by preheating your oven to 350°F (175°C). This ensures your oven is ready to create a perfectly baked crust and filling. Line a 9×13-inch baking pan with parchment paper, leaving a bit of overhang on the sides. This overhang acts like handles, making it easy to lift the bars out later for clean, precise cuts. Lightly grease the parchment with a touch of butter or non-stick spray to ensure nothing sticks.
Step 2: Craft the Buttery Graham Cracker Crust
In a medium mixing bowl, combine 1 ½ cups graham cracker crumbs and ¼ cup granulated sugar. Stir until evenly mixed. Pour in ½ cup melted unsalted butter and mix until the crumbs resemble wet sand. The butter adds richness and helps the crust hold together.
Press this mixture firmly into the bottom of your prepared pan, creating an even layer. Use the back of a spoon or the bottom of a measuring cup to pack it tightly for a sturdy base. Bake the crust for 8–10 minutes, or until it’s lightly golden and fragrant. Remove from the oven and set aside to cool slightly while you prepare the filling. This brief cooling helps the crust set before adding the creamy layer.
Step 3: Whip Up the Silky Cheesecake Filling
In a large mixing bowl, use an electric mixer (or a stand mixer fitted with a paddle attachment) to beat 2 (8-ounce) packages of softened cream cheese with ¾ cup granulated sugar until smooth, creamy, and free of lumps. This usually takes about 2–3 minutes on medium speed. Scrape down the sides of the bowl as needed to ensure everything is well incorporated.
Add 1 teaspoon vanilla extract for a warm, aromatic note, and mix until combined. Next, add 2 large eggs, one at a time, beating well after each addition. The eggs should be fully incorporated, creating a glossy, velvety batter that’s ready to become the star of your dessert.
Step 4: Assemble the Layers of Flavor
Pour half of the cheesecake batter over the cooled graham cracker crust, spreading it evenly with a spatula. Drizzle ½ cup of caramel sauce over the batter in a zigzag pattern for a beautiful marbled effect. Sprinkle 3 chopped fun-size Butterfinger candy bars (about ⅔ cup) evenly over the caramel layer, adding that signature peanut butter crunch.
Carefully pour the remaining cheesecake batter over the Butterfinger layer, gently spreading it to cover the candy and caramel. Don’t worry if some caramel peeks through—it adds to the rustic charm!
Step 5: Bake to Perfection
Place the pan in the preheated oven and bake for 30–35 minutes, or until the edges are set and lightly golden, with the center still slightly jiggly (like a soft custard). The residual heat will continue to set the center as it cools, ensuring a creamy texture. Avoid overbaking to keep the bars luscious rather than dense.
Remove the pan from the oven and place it on a wire cooling rack. Allow the bars to cool completely at room temperature, which typically takes about 1–2 hours. This gradual cooling prevents cracks and helps the flavors meld.
Step 6: Add the Final Touches
Once the bars are fully cooled, drizzle the remaining ½ cup caramel sauce over the top in a decorative pattern. Scatter the remaining 2 chopped fun-size Butterfinger candy bars (about ⅓ cup) over the caramel for a pop of texture and color. For an extra touch of elegance, you can lightly dust the bars with a pinch of sea salt if your caramel sauce isn’t salted, enhancing the sweet-savory balance.
Step 7: Chill and Slice
Cover the pan with plastic wrap or foil and refrigerate for at least 2 hours, though 4 hours or overnight is ideal for the best texture and flavor. When ready to serve, use the parchment paper overhang to lift the entire slab out of the pan. Place it on a cutting board and use a sharp knife to cut into 12–16 bars, depending on your preferred size. For clean cuts, wipe the knife with a warm, damp cloth between slices.
Serving Suggestions and Storage Tips
These Butterfinger Caramel Cheesecake Bars are a showstopper on their own, but here are a few ways to elevate the experience:
- Serve with a dollop of whipped cream for an extra creamy touch.
- Pair with a scoop of vanilla ice cream for an indulgent dessert plate.
- Drizzle with melted chocolate for a triple-threat dessert (chocolate, caramel, and Butterfinger!).
Storage: Store the bars in an airtight container in the refrigerator for up to 5 days. For longer storage, wrap individual bars tightly in plastic wrap and freeze for up to 2 months. Thaw in the refrigerator overnight before serving.
Tips for Success
- Room-Temperature Ingredients: Ensure your cream cheese and eggs are at room temperature to avoid lumps in the filling. This makes a huge difference in achieving that silky texture.
- Homemade Caramel Sauce: If you have time, try making your own caramel sauce for a richer, more personalized flavor. Just be sure it’s cooled to room temperature before using.
- Crust Variations: Swap graham crackers for crushed vanilla wafers or chocolate sandwich cookies for a fun twist on the crust.
- Butterfinger Substitutes: If Butterfinger isn’t your favorite, try other crunchy candy bars like Snickers, Heath, or Reese’s Pieces for a different flavor profile.
- Prevent Sticking: Lining the pan with parchment paper is key to easily removing the bars. Don’t skip this step!
Nutritional Information (Approximate)
- Serving Size: 1 bar (based on 12 servings)
- Calories: ~400 kcal
- Fat: 25g
- Carbohydrates: 40g
- Protein: 5g
Note: Nutritional values are estimates and may vary based on specific brands and ingredient substitutions.
Why You’ll Love These Bars
These Butterfinger Caramel Cheesecake Bars are the perfect marriage of textures and flavors: a crisp, buttery crust, a creamy cheesecake layer, gooey caramel swirls, and the unmistakable crunch of Butterfinger candy. They’re versatile enough for casual family gatherings or fancy enough for holiday dessert tables. Plus, they’re make-ahead-friendly, allowing you to focus on enjoying your event rather than stressing in the kitchen.
Prep and Cooking Times
- Prep Time: 20 minutes
- Cooking Time: 35 minutes
- Chilling Time: 2–4 hours
- Total Time: ~3 hours (including chilling)
- Servings: 12–16 bars