Lemon Bliss Tart: A Zesty No-Bake Delight
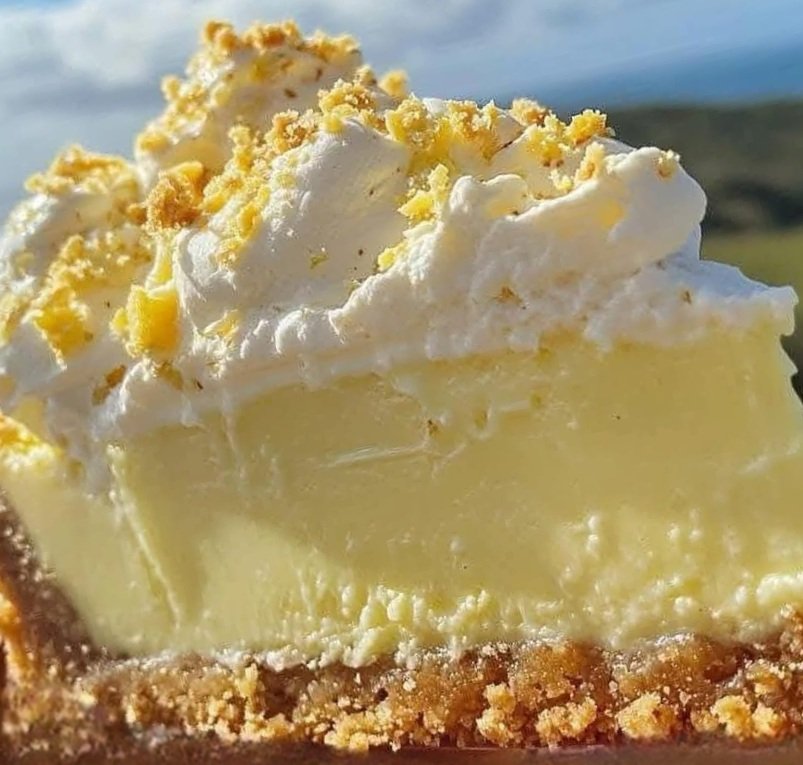
Imagine savoring a slice of sunshine on a crisp, scenic day—this Lemon Bliss Tart is exactly that! With a buttery digestive biscuit crust, a creamy lemon filling, and a cloud of whipped cream topped with a sprinkle of crushed chocolate or lemon zest, this no-bake dessert is a celebration of bright, tangy flavors. The image of this tart against a breathtaking backdrop of blue skies and rolling hills only adds to its allure, making it the perfect treat for picnics, gatherings, or a refreshing end to any meal. Let’s dive into this citrusy masterpiece that’s as easy to make as it is delightful to eat!
Why You’ll Love This Recipe
- No-Bake Simplicity: No oven required—perfect for warm days or when you want a fuss-free dessert.
- Bright and Zesty: The lemon flavor shines through, balanced by the sweetness of condensed milk.
- Customizable Topping: Choose between crushed chocolate or extra lemon zest for a personal touch.
- Perfect for Any Occasion: From casual picnics to elegant dinner parties, this tart fits right in.
Ingredients (Serves 8-10)
For the Digestive Biscuit Crust:
- 1 packet (about 14 oz / 400 g) digestive biscuits (or graham crackers for a similar vibe)
- ¼ cup (60 g) unsalted butter, melted (adds a rich, golden base)
For the Lemon Filling:
- 1 tin (14 oz / 397 g) sweetened condensed milk (for creamy sweetness)
- ½ cup (120 ml) fresh lemon juice (about 2-3 lemons, for that vibrant tang)
- ¼ cup (25 g) lemon zest (from about 2 lemons, for extra zing)
For the Topping:
- 1 cup (240 ml) heavy cream, whipped to soft peaks (or use pre-whipped cream for convenience)
- 2 small chocolates of your choice, crushed (think dark chocolate, white chocolate, or even a lemon-infused variety)
- Optional: Extra lemon zest for a citrusy garnish
Equipment Needed
- 9-inch tart pan or pie dish (preferably with a removable bottom)
- Food processor or rolling pin (for crushing biscuits)
- Medium mixing bowl
- Small saucepan or microwave-safe bowl (for melting butter)
- Zester or microplane
- Citrus juicer
- Electric mixer or whisk (for whipping cream)
- Spatula
Step-by-Step Instructions
- Prepare the Buttery Biscuit Crust:
Start by crushing the digestive biscuits into fine crumbs. You can do this by placing them in a food processor and pulsing until sandy, or by putting them in a resealable plastic bag and crushing them with a rolling pin. Transfer the crumbs to a medium mixing bowl. Melt the butter in a small saucepan over low heat or in the microwave, then pour it over the crumbs. Stir until the mixture resembles wet sand and holds together when pressed. Press this mixture firmly into the bottom and up the sides of a 9-inch tart pan or pie dish, using the back of a spoon or the bottom of a glass to create an even layer. Pop the crust in the refrigerator to set while you prepare the filling—this helps it firm up beautifully. - Make the Luscious Lemon Filling:
In a medium bowl, combine the sweetened condensed milk, fresh lemon juice, and lemon zest. Whisk gently until fully blended—the mixture will thicken slightly as the lemon juice reacts with the condensed milk, creating a silky, tangy filling. Taste and adjust if you’d like a bit more zest for extra brightness. Remove the crust from the fridge and pour the lemon filling into it, spreading it evenly with a spatula. Return the tart to the refrigerator to chill for at least 1 hour, allowing the filling to set and the flavors to meld. - Whip the Cream Topping:
While the tart chills, whip the heavy cream. Pour the cream into a chilled mixing bowl and use an electric mixer or whisk to beat it until soft peaks form—this should take about 2-3 minutes with a mixer. Be careful not to overwhip; you want the cream to be light and fluffy, not stiff. If using pre-whipped cream, you can skip this step, but freshly whipped cream adds a lovely homemade touch. - Assemble the Tart:
Once the lemon filling has set, spoon or pipe the whipped cream over the top of the tart, creating soft swirls or an even layer—whatever feels most inviting to you! The whipped cream adds a light, airy contrast to the rich lemon filling. - Add the Final Touch:
Sprinkle the crushed chocolate over the whipped cream for a delightful crunch and a hint of sweetness. If you prefer a more citrus-forward finish, opt for extra lemon zest instead, scattering it generously for a pop of color and flavor. You can even do a mix of both for a balance of indulgence and freshness. - Chill and Serve:
Refrigerate the tart for another 30 minutes to ensure everything sets beautifully. When ready to serve, slice into wedges and plate with a backdrop as stunning as the one in the image—think blue skies and rolling hills! The tart’s creamy texture, zesty lemon flavor, and buttery crust will melt in your mouth, leaving you with a burst of sunshine in every bite.
Storage and Serving Tips
- Storage: Keep the tart in an airtight container in the refrigerator for up to 3 days. The flavors deepen over time, but the crust may soften slightly.
- Serving: Serve chilled for the best texture. Pair with a cup of tea, coffee, or a glass of sparkling lemonade for a refreshing treat.
- Make-Ahead: You can prepare the crust and filling a day in advance, adding the whipped cream and toppings just before serving to keep them fresh.
Creative Variations
- Berry Twist: Add a handful of fresh raspberries or blueberries on top for a fruity contrast.
- Coconut Vibes: Mix ¼ cup of toasted shredded coconut into the biscuit crust for a tropical flair.
- Ginger Snap: Swap digestive biscuits for gingersnaps to add a warm, spicy note to the crust.
- Extra Indulgence: Drizzle with a little melted white chocolate before adding the crushed chocolate topping.
A Personal Reflection
This Lemon Bliss Tart reminds me of carefree summer days spent by the coast, where the tangy lemon filling felt like a burst of sunshine against the sea breeze. The image of this tart held against such a stunning backdrop makes me want to pack a picnic and head to the nearest hilltop! I hope this recipe brings a little bit of that joy to your table—whether you’re enjoying it outdoors or in the comfort of your home.