Ultimate Cheesy Ranch Chicken: A Creamy, Flavor-Packed Family Favorite 🍗🧀
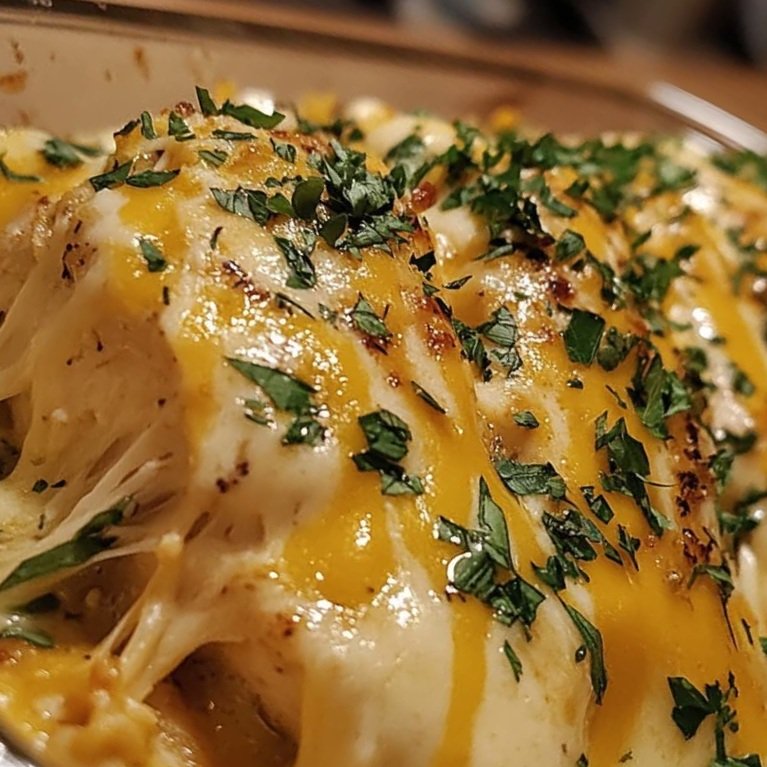
Looking for a dinner that’s quick to prep, bursting with flavor, and guaranteed to win over even the pickiest eaters? This Ultimate Cheesy Ranch Chicken is your answer! Tender chicken breasts are smothered in zesty ranch dressing, topped with a generous layer of melted cheddar and Parmesan, and baked to golden perfection. The result is a creamy, cheesy, savory masterpiece that pairs beautifully with your favorite sides, from roasted vegetables to buttery mashed potatoes. Whether you’re whipping up a weeknight meal or hosting a casual gathering, this dish delivers comfort and satisfaction in every bite.
With just a handful of ingredients and minimal prep, this recipe is a lifesaver for busy home cooks. Let’s dive into how to create this crowd-pleasing dish that’s destined to become a staple in your meal rotation!
Why You’ll Love This Cheesy Ranch Chicken
- Effortless to Make: With only 10 minutes of prep, this recipe is perfect for hectic evenings.
- Bold Flavors: The tangy ranch dressing combined with gooey cheese creates an irresistible flavor profile.
- Versatile: Serve it with a variety of sides or even shred the chicken for sandwiches or salads.
- Family-Friendly: Kids and adults alike will be asking for seconds (and maybe thirds!).
Recipe Details
- Servings: 4
- Prep Time: 10 minutes
- Cook Time: 30–35 minutes
- Total Time: 40–45 minutes
Ingredients
To make this mouthwatering dish, gather the following ingredients. Feel free to adjust seasonings to suit your taste!
- 4 boneless, skinless chicken breasts (about 1.5–2 pounds, depending on size)
- 3/4 cup ranch dressing (use your favorite store-bought brand or make your own for extra flair)
- 1 1/4 cups shredded sharp cheddar cheese (for that melty, gooey texture)
- 3/4 cup grated Parmesan cheese (adds a nutty, savory depth)
- 1 1/2 teaspoons garlic powder (for a subtle kick)
- 1 teaspoon onion powder (enhances the savory notes)
- 1 tablespoon dried parsley flakes (for a pop of color and herbaceous flavor)
- 1/2 teaspoon smoked paprika (optional, for a hint of smokiness)
- Kosher salt and freshly ground black pepper, to taste
- Optional garnish: Fresh chopped parsley or chives for a vibrant finish
Equipment Needed
- A 9×13-inch baking dish (or similar size)
- Measuring cups and spoons
- A small bowl for mixing seasonings (optional)
- Aluminum foil (for easy cleanup, if desired)
Step-by-Step Instructions
Follow these simple steps to create a cheesy, ranch-infused chicken dish that’s sure to impress:
- Preheat the Oven
Set your oven to 375°F (190°C) and allow it to fully preheat. This ensures even cooking and perfectly melted cheese. If you’d like to make cleanup easier, line your baking dish with aluminum foil or lightly grease it with cooking spray. - Season the Chicken
Pat the chicken breasts dry with paper towels to help the seasonings stick. Sprinkle both sides of each breast with kosher salt, black pepper, garlic powder, onion powder, and smoked paprika (if using). Rub the seasonings into the chicken to ensure even flavor distribution. This step builds a flavorful foundation for the dish. - Arrange in Baking Dish
Place the seasoned chicken breasts in a single layer in your prepared baking dish. Make sure they’re not overlapping to ensure even cooking. If the breasts are particularly thick, consider pounding them to an even thickness (about 3/4 inch) for faster, more uniform cooking. - Add the Ranch Dressing
Pour the ranch dressing over the chicken breasts, using a spoon or spatula to spread it evenly across the top of each piece. The creamy dressing acts as a marinade and sauce, infusing the chicken with tangy, herbaceous goodness. For an extra flavor boost, you can mix a pinch of garlic powder or dried herbs into the ranch before spreading. - Top with Cheese
Sprinkle the shredded cheddar cheese generously over the chicken, followed by the grated Parmesan. The cheddar brings that classic melty texture, while the Parmesan adds a crispy, golden crust as it bakes. Don’t skimp on the cheese—this is where the magic happens! - Bake to Perfection
Place the baking dish in the preheated oven and bake for 30–35 minutes, or until the chicken reaches an internal temperature of 165°F (74°C) and the cheese is bubbly and lightly golden. If you prefer an extra crispy cheese topping, you can broil the dish for 1–2 minutes at the end—just keep a close eye to avoid burning. - Garnish and Serve
Remove the chicken from the oven and let it rest for 5 minutes to lock in the juices. Sprinkle with dried parsley flakes or fresh chopped parsley/chives for a pop of color. Serve hot and savor the cheesy, ranch-infused deliciousness!
Serving Suggestions
This versatile dish pairs beautifully with a variety of sides to create a well-rounded meal. Here are some ideas to complement your cheesy ranch chicken:
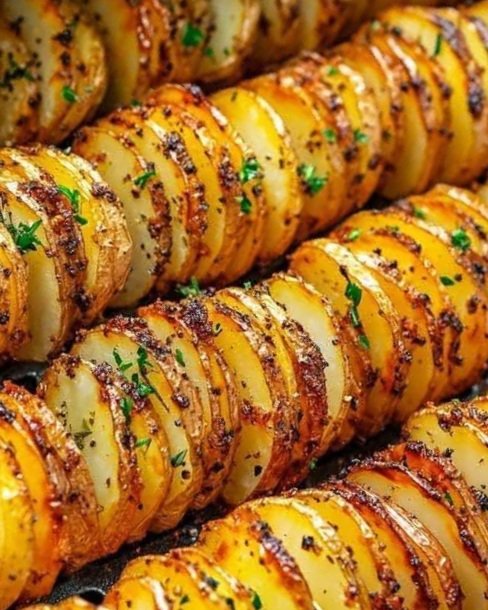
- Vegetables: Roasted broccoli, sautéed green beans, or a crisp garden salad with ranch dressing (to echo the flavors).
- Starches: Creamy mashed potatoes, garlic butter rice, or warm dinner rolls to soak up the cheesy sauce.
- Low-Carb Options: Cauliflower mash or zucchini noodles for a lighter meal.
- For a Twist: Slice the cooked chicken and serve it in tortillas with lettuce and tomatoes for cheesy ranch chicken tacos!
Tips for Success
- Check Chicken Doneness: Use a meat thermometer to ensure the chicken reaches 165°F (74°C) for safety. Overcooking can dry out the chicken, so start checking around the 25-minute mark if your breasts are thin.
- Customize the Cheese: Swap cheddar for Monterey Jack or a Mexican blend for a different flavor profile. Mozzarella works well for an extra stretchy texture.
- Make It Spicy: Add a pinch of cayenne pepper or red pepper flakes to the seasoning mix for a subtle heat.
- Homemade Ranch: If you have time, whip up a homemade ranch dressing with buttermilk, mayo, and fresh herbs for an elevated flavor.
- Storage: Store leftovers in an airtight container in the fridge for up to 3 days. Reheat in the oven at 350°F (175°C) to maintain the cheese’s texture.
Recipe Variations
Make this dish your own with these creative twists:
- Bacon Ranch Chicken: Sprinkle cooked, crumbled bacon over the cheese before baking for a smoky, indulgent upgrade.
- Buffalo Ranch Chicken: Mix 2 tablespoons of buffalo sauce into the ranch dressing for a spicy kick.
- Veggie-Packed: Add a layer of sautéed mushrooms, spinach, or diced bell peppers under the cheese for extra nutrition.
- Crispy Topping: Mix 1/4 cup of crushed Ritz crackers or panko breadcrumbs with the Parmesan for a crunchy topping.
Frequently Asked Questions
Can I use chicken thighs instead of breasts?
Absolutely! Boneless, skinless chicken thighs work wonderfully and stay extra juicy. Adjust the cooking time as needed, aiming for an internal temperature of 165°F (74°C).
Can I make this dish ahead of time?
Yes! Assemble the chicken, ranch, and cheese in the baking dish, cover tightly, and refrigerate for up to 24 hours. When ready to bake, let it sit at room temperature for 15 minutes, then bake as directed.
Can I freeze cheesy ranch chicken?
You can freeze the cooked dish for up to 2 months. Wrap individual portions tightly in plastic wrap and aluminum foil, then store in a freezer-safe bag. Thaw in the fridge overnight before reheating.
Why This Recipe Stands Out
This cheesy ranch chicken isn’t just another baked chicken recipe—it’s a celebration of bold, comforting flavors that come together with minimal effort. The creamy ranch dressing infuses the chicken with tangy, herbaceous notes, while the double-cheese topping creates a decadent, golden crust that’s impossible to resist. Whether you’re a seasoned home cook or a beginner, this recipe is approachable, customizable, and guaranteed to impress.
Final Thoughts
Ready to bring some cheesy, ranch-infused magic to your dinner table? This Ultimate Cheesy Ranch Chicken is the perfect way to satisfy your comfort food cravings without spending hours in the kitchen. Give it a try for your next family dinner, and don’t be surprised when it becomes a regular request! Pair it with your favorite sides, experiment with fun variations, and enjoy the smiles around the table.
Have you tried this recipe or added your own twist? Share your thoughts in the comments below—we’d love to hear how it turned out!