
7 Smart Kitchen Hacks (Inspired by Grandma’s Wisdom!)

Because sometimes, old-school tricks are the best “life hacks” around!
Once upon a time, we simply called them “grandma’s tips”—those clever little tricks passed down through generations that made life easier in the kitchen. Today, they’re known as life hacks… but the magic is still the same! Many of these tips even have science-backed explanations. So whether you’re looking to cook smarter or fix small kitchen mishaps in a flash, here are 7 simple, effective tricks to keep up your sleeve—starting with smoothie storage!
1. How to Keep Smoothies Fresh and Vibrant
Red, green, golden… smoothies are a burst of color and good vibes in a glass! These 100% fresh fruit blends have become a breakfast staple for health-conscious foodies. But let’s be real—not everyone has time to whip up a fresh smoothie every morning. And the big question is: how do you store smoothies without losing nutrients and color?
Here’s how to keep your smoothies fresh:
- Keep it airtight: Fresh air is your smoothie’s biggest enemy. If you blend your smoothie the night before, pour it into a tightly sealed jar, then store it in the fridge away from light. A dark corner of your fridge—or even better, your freezer-fridge combo—is ideal.
- Add a splash of lemon juice: Especially for smoothies with apples, strawberries, or other oxidation-prone fruits. Lemon juice helps preserve color and slows down browning. No more sad brown smoothies!
- Prep smoothie packs in advance: Chop your smoothie ingredients, sort them into freezer-friendly bags or containers, and freeze in single-serve portions. In the morning, just blend with milk or yogurt—and voilà! A delicious, nutrient-rich breakfast in minutes.

2. What to Do When Your Soup, Sauce, or Stew Is Too Salty?
Oops… too much salt? Don’t panic—Grandma’s got your back!
We’ve all been there: a distracted moment in the kitchen, and—oops!—you’ve accidentally dumped too much salt into your soup or stew. Whether it was a slippery salt shaker or just a heavy-handed pour, here are a few smart, science-backed ways to rescue an overly salty dish.
Quick Fixes for Over-Salted Dishes:
- Scoop Out the Salt (Yes, Really!):
If you just dropped a heap of salt into your pot, grab a spoon and scoop out as much as you can before it dissolves. This trick is especially useful when the shaker lid comes loose mid-shake. Pro tip: always measure salt into your palm first—that way, you’re in control! - Dilute It (If Possible):
If your dish allows it, add a neutral liquid like water, low-sodium broth, cream, or milk to balance the saltiness. A splash of heavy cream or cream cheese can work wonders in potato dishes or creamy stews—but be mindful, as they’ll also add flavor. - The Famous Potato Trick:
Cut a raw potato into large chunks and simmer it in your dish for about 15 minutes, then remove it. The potato’s starch will absorb excess salt and soften the overall flavor. You can also try this with a slice of stale bread, but don’t leave it in too long or it may break apart. - Balance with Sweetness (Yes, Really!):
For solid foods like roasts, brushing them with a touch of honey or agave syrup can help mask saltiness and even create a beautiful caramelized crust. A spoonful of maple syrup or honey can also work wonders in a salty salad dressing. - Double the Dish:
Got extra ingredients and nowhere to be tonight? Make another batch—without salt—and combine it with your overly salty one. This method is great for freezer-friendly meals and helps stretch your cooking into future meals.
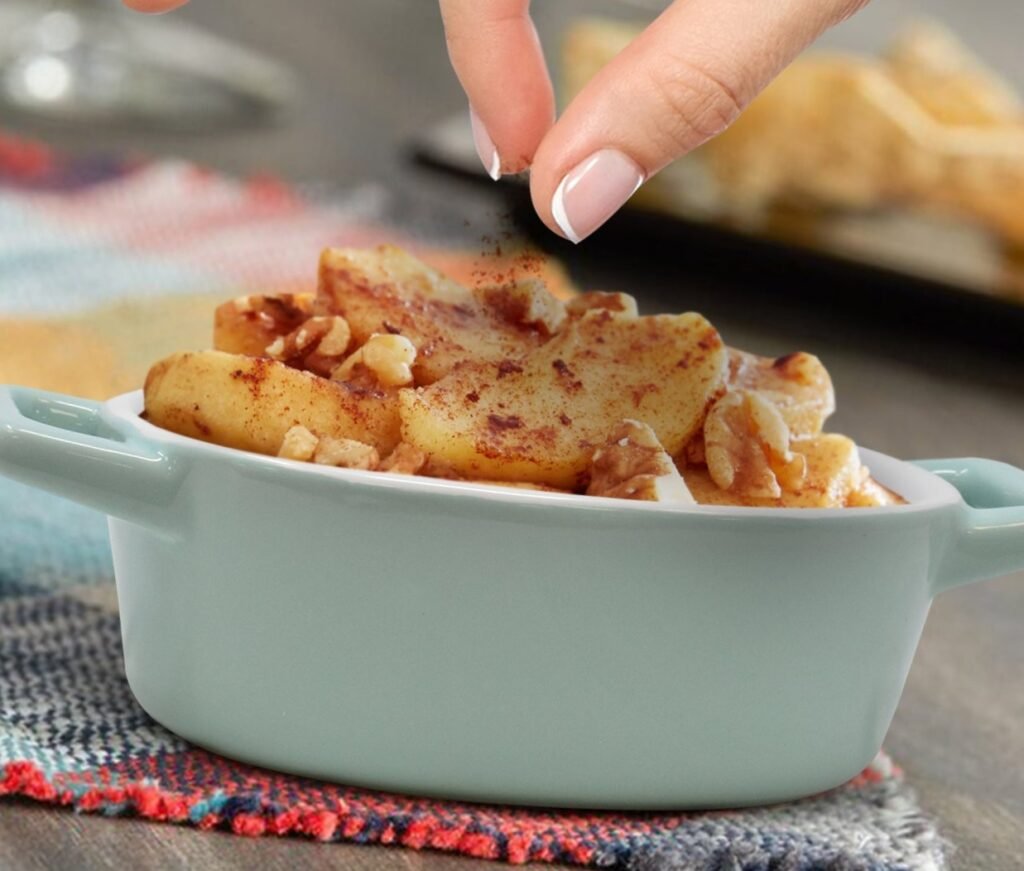
3. How to Bake Four Dishes in the Oven at the Same Time
Dinner party for twelve? No problem—your oven’s got range!
When you’re hosting a big dinner and the guest list keeps growing, efficiency becomes your best friend. That’s where this clever cooking hack comes in: baking multiple dishes at once in the oven! Whether you’re serving up a full four-course feast or batch-cooking for the week, this method helps you stay on schedule—without compromising flavor or texture.
Cook Smarter, Not Harder: The Four-Dish Oven Trick
Thanks to modern innovations like Whirlpool’s Cook4 technology, it’s now easier than ever to bake four different dishes simultaneously—roasts, stews, savory pies, even desserts—without mixing aromas or flavors.
Even if you don’t have a Whirlpool oven, these tips will help you maximize oven space and bake like a pro:
How It Works:
- Stack Strategically:
Place your dishes on separate oven racks, ensuring there’s enough space between them for proper airflow. Don’t overcrowd the oven, as this can block heat circulation and lead to uneven cooking. - Plan by Temperature:
Choose recipes that bake at similar temperatures (within 25°F/15°C of each other). Most savory dishes can tolerate slight variations in temperature, especially if you adjust the baking time slightly. - Rotate If Needed:
If your oven doesn’t have advanced air circulation, rotate the trays halfway through baking for even browning and doneness. - Use Oven-Safe Covers:
Covering strong-smelling dishes (like garlicky roasts or cheesy bakes) with foil or lids helps contain aromas, so your apple crisp won’t taste like your lasagna. - Keep an Eye on Time:
Set multiple timers or label your dishes with sticky notes so you can track when to pull each one out.
With a little planning and a well-organized oven, you can get an entire meal on the table—starters, mains, and desserts—fresh and hot at the same time.
4. What to Do If Your Springform Pan Is Too Big
Because size does matter—at least when it comes to baking pans!
You’ve found the perfect cheesecake or sponge cake recipe… but wait—the pan size doesn’t match what you’ve got in your cupboard. Don’t panic, and definitely don’t start wildly guessing ingredient amounts! When it comes to baking, proportions are everything, and a pan that’s too large can lead to flat, dry, or unevenly baked results.
So, what’s a home baker to do when their springform pan is too big?
Here’s a genius trick—no calculator required!
Create a Custom-Sized Pan Using Foil:
- Tear off several long sheets of aluminum foil.
- Fold and shape them into sturdy circles or “walls” and place them inside your springform pan to reduce the diameter.
- Keep adding layers until the interior space matches the size called for in your recipe.
- Line the adjusted area with parchment paper to keep batter from sticking to the foil and to smooth out the inner surface.
Voilà! You’ve now resized your pan using just kitchen staples—no math, no mess, and no need to run out and buy a new pan.
Why It Works:
This clever little kitchen hack is all about volume control. Baking is a science, and cake batter is designed to rise and set based on depth and area. With this foil barrier method, you can stick to the original recipe proportions and still get that perfectly tender, fluffy result.
A Little Pasta Wisdom: Never Rinse Your Pasta!
Let’s talk about a golden rule straight from the heart of Italy: never rinse your pasta after cooking. Ever.
Why not?
- It cools down your pasta way too fast—killing that warm, comforting vibe before it hits the plate.
- It washes away the natural starch, which is exactly what gives your sauce that luscious, clingy, creamy texture we all love.
So what should you do instead?
After draining your pasta (always in plenty of salted water and giving it a good stir now and then), toss it with a little drizzle of olive oil. Not only does it prevent sticking, but it also adds a touch of Mediterranean elegance to your bowl.
Simple, flavorful, and oh-so-authentic—just the way Nonna would want it!
7. How to Quickly Defrost Bread
Because no one wants to wait hours for a slice of toast on a lazy Sunday morning!
Bread—whether it’s baguette, sourdough, or sandwich slices—freezes beautifully and can last for months in the freezer. But when hunger strikes and you’ve forgotten to take it out the night before, what then?
Here’s how to defrost bread quickly and properly:
1. Microwave Magic
If your microwave has a defrost setting, use it! It’s quick, efficient, and ideal for softening frozen loaves or rolls in a pinch.
2. Oven to the Rescue
Preheat your oven to 180°C (350°F) and place your frozen bread directly on the rack.
- Whole loaves: Bake for about 30 minutes, then let them cool at room temperature for another 30 minutes before slicing.
- Small rolls or sandwich buns: They’ll be ready in just 10 minutes—crispy on the outside and soft on the inside!
3. Toaster Trick for Slices
If you’ve frozen pre-sliced bread, pop the slices straight into the toaster—no thawing needed. For oven defrosting, lay them flat on a tray and warm at 180°C for 10–15 minutes.
Bonus Pasta Tip from Nonna’s Kitchen:
While we’re on the subject of kitchen wisdom—never rinse your pasta after boiling!
- Rinsing cools the pasta too quickly and washes away the precious starch, which is what helps your sauce cling and turn creamy.
- Instead, after draining, toss the pasta with a drizzle of olive oil to keep it from sticking and enhance the flavor.